If you have a plan view and at least a couple of elevations, you can whip up a two point perspective view of a room without much trouble.
You will want to know how to set up a two point perspective drawing with horizon, vanishing points and measuring points how to use those things. If you need a quick reminder, you can see my previous post on how to construct a cube in two point perspective.
Setting Up
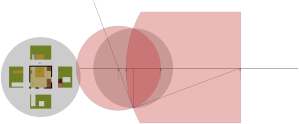
Here is an overview of the perspective setup:
I used a circle that entirely encloses my plan and elevations as a 90 degree cone of vision. I like to stay within 60 degrees, but I expect the perspective to be well within this circle. I chose a corner orientation that I think (hope) is going to turn out pretty well, then laid out my measuring points.
Constructing Planes For Walls And Floor
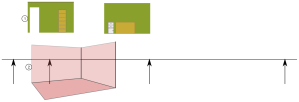
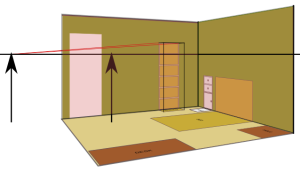
I want to view this room as if I were standing, which I will say would put me eye about 5 ft off the ground. So, I put copies of the elevations in accordingly and constructed the walls and the floor:
Copies are free, and you’re going to want your original later! So make copies of your elevations. Note that the horizon line is at eye level, and I put in the walls in such a way that they appear to have been folded out from the perspective view. I struck lines from the measuring points through the corresponding wall corners to lines projected from the main corner (which also happens to be at the center of vision), to the vanishing points. Where these measuring lines intersected the projected lines defined the room corners in the perspective view. I then made paths connecting the four corners of each perspective wall, always starting with the bottom left corner.
Finally, I projected lines from the vanishing points through the floor corners to define the near point of the floor, and then created a path to define the floor.
Mapping The Walls To The Perspective View
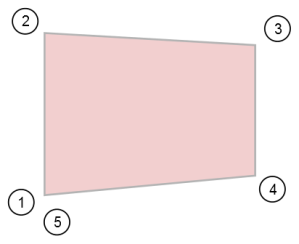
Now we get to use a really nice tool that Inkscape provides, which will take our elevations and plan view and fit them to the perspective view. To get this to work, we have to do things a certain way. I mentioned creating the perspective faces always starting at the bottom left – here’s a little diagram of how you have to draw these faces:
Now I’ve done three of these already, and maybe you have too. I hope you did them in the right order, but if you didn’t, it’s no big deal to recreate them. So, now that you have your faces created the right way, move your elevations out of the way. Then, select first the elevation, then the plane it’s going to map to:
Now select the menu option Extensions > Modify Path > Perspective. If you’re really lucky, you’ll get this:
If you’re not so lucky, maybe you left some things behind, or your elevation is upside down or backwards or both.
If you have trouble taking everything with you, undo the perspective command. Make sure everything you want to take is grouped, then select the group. Pick Paths > Object To Path. Now deselect, make your selection for the perspective command, and execute it again.
If you had orientation trouble, you probably haven’t got your face built quite right. Back up and try again. Once you get the hang of it you’ll never miss – and this command makes it a lot easier t build the perspective view.
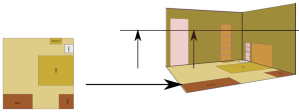
The other wall should present no problem, but the floor has a slight twist in that you have to take the walls off before you map it to get an accurate view:
Here you see the “naked” floor – note the orientation you have to have – and the result. You can see that even the labels have been put in perspective! Meditate on that for a moment – there are some nice possibilities there.
Making The Furniture
Now we are in a position to make the furniture – we’ll quickly build the bed, the bookcase and the bedside table. You will be glad later if you put each of these on its own layer – then you can toggle them on and off at will.
The Bookcase
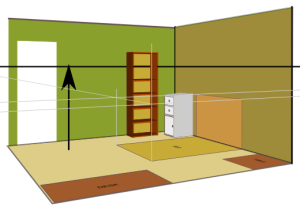
Use the left vanishing point to project the top edges of the bookcase. Use the footprint on the projected plan view to bring up two verticals from the front of the bookshelf. Connect the dots, and you’ve got the basic shape:
Now bring up a copy of the bookshelf elevation by itself, make a face on the front of the bookshelf, and map the elevation onto the front perspective:
That’s all you’re going to need to build faces and finish the drawing:
Now, with a similar procedure you can put the front on the bedside table and fill in the sides and the top, and even more easily, outline the bed.
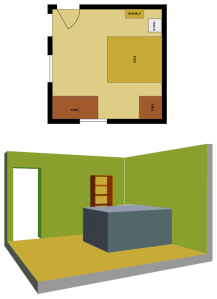
Apply a couple of faces to the bed and your done building furniture. Then, add some depth to the doorway and re-lay the floor without the extra furniture and we can call it a day:
OK, the “Bed” took a left turn somewhere due to my eyeballed dimensions, but the concept is there.
Of course this is a really simple example but I hope this demonstrates how you can get a pretty good start on a more serious drawing using Inkscape’s perspective tool and a little preliminary drawing.



This is a really great site.